This tutorial covers the groundwork of making a function 'scissor paper rock' game with console.log output. Once you have completed this tutorial, the next one goes into more advanced features like changing scores and having a 'spinning' computer guess icon.
We use expandable boxes to consolidate information and code. It is recommended that you close each section when you are finished by re-clicking the blue button.
1) OPEN START REPL
Open up the starting file below and 'fork' it to create one you can make changes to:
Get starting REPL
The left hand panel should show HTML, an images folder, Javascript and CSS. Click between these and look at the code for each of them (JS is blank to start with).
If you don't see where you can choose between HTML, CSS and JS then click on the files icon on top left
2) HIGHLIGHT EACH SECTION
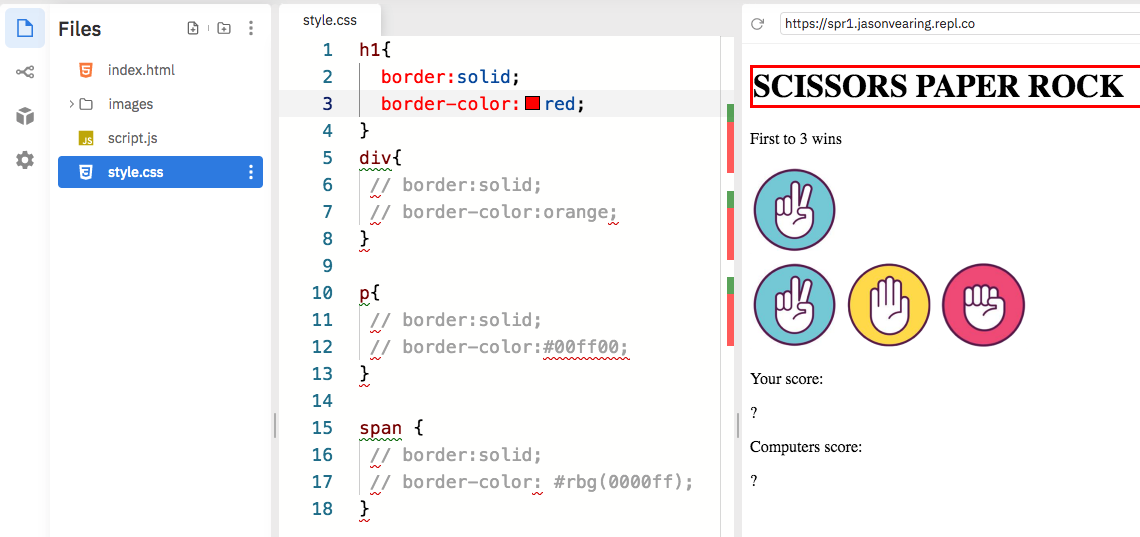
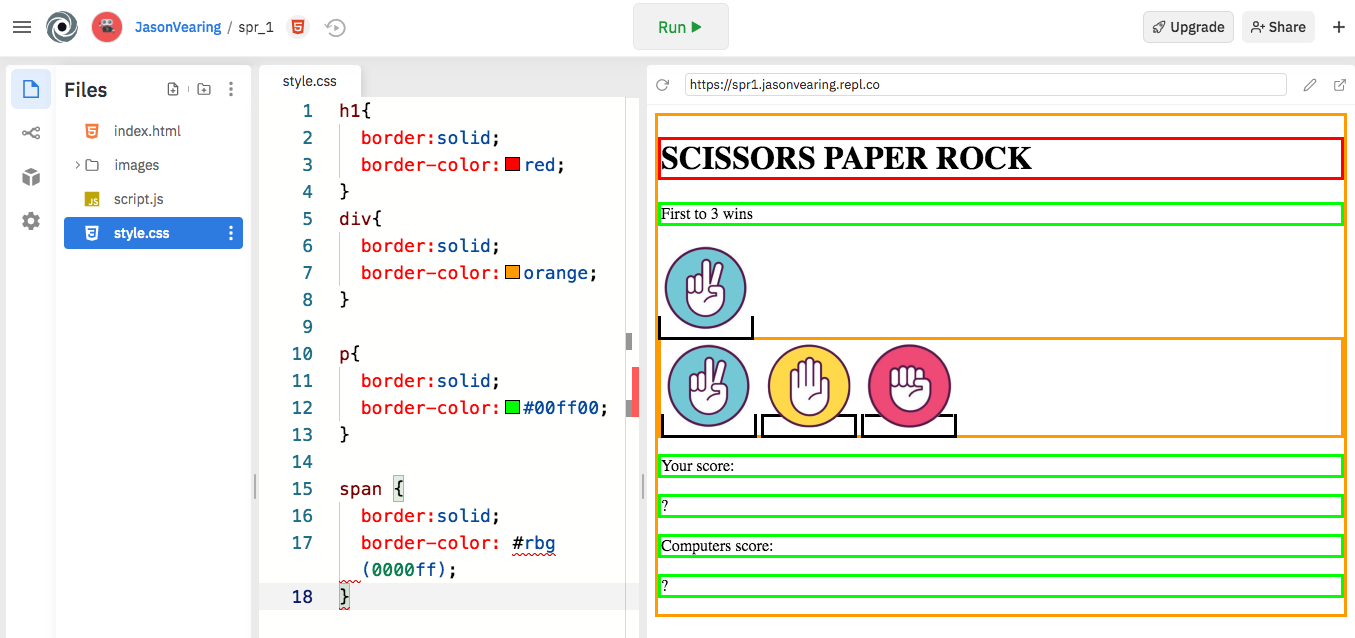
We are going to target CSS to put colored borders around every component:
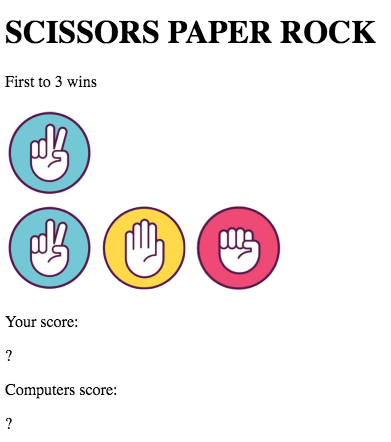
Click run button and you should the game should look like this:
Go to the CSS section and remove the '//' before each line. To see the effect of each one, click on run after you undo each one so that you know what section is the 'div', what section is the 'p' etc.
Here I can see what the h1 section is. Your page should look this when you are finished
3) JAVASCRIPT - ADD SOME OUTPUT TO THE CONSOLE
We are going to make use of the console. When we click Run we are going to see the programs random pick of 'Scissors, Paper or Rock'.
The console is located at the bottom of the program output. It may be hidden so you will need to look for an little arrow to expand it.
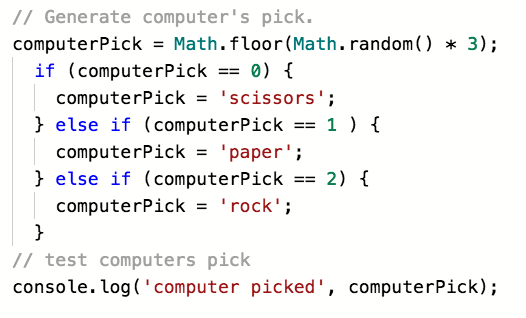
Type the following code into the Javascript section.
We are storing a random number 0, 1 or 2 into a variable called computerPick. Then we assign different strings of text to each number and then display the result in the console. You can change the red string of text to what you like, but the value at the end of the sentence is whatever is stored inside the variable called computerPick.
Test this enough times to make sure only the words Scissors, paper or Rock are generated and there are no errors or bugs at this stage.
4) REPLACE THE ? PLACEHOLDERS WITH ACTUAL VALUES
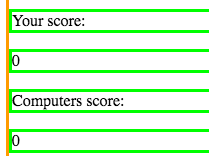
Go to the HTML section and on lines 23 and 25 see if you can find the '?'. These are placed into the program in the HTML and we are going to replace these with Javascript values.
What 'id' do the two lines that have ? placeholders as their inner HTML have?
We are going to target these teo elements by this id and replace the inner HTML with values of '0'.
JS section:
Here we create two variables and assign them values of zero. Then we target the elements that have the id's of 'userScore' and 'computerScore' and replace them with the values of the variables. These scores will change throughout the game.
Check your work:
If we run the Javascript code and the ? are still showing, we know we have made a mistake.
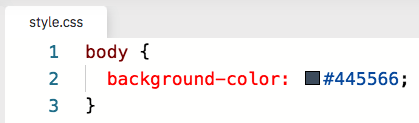
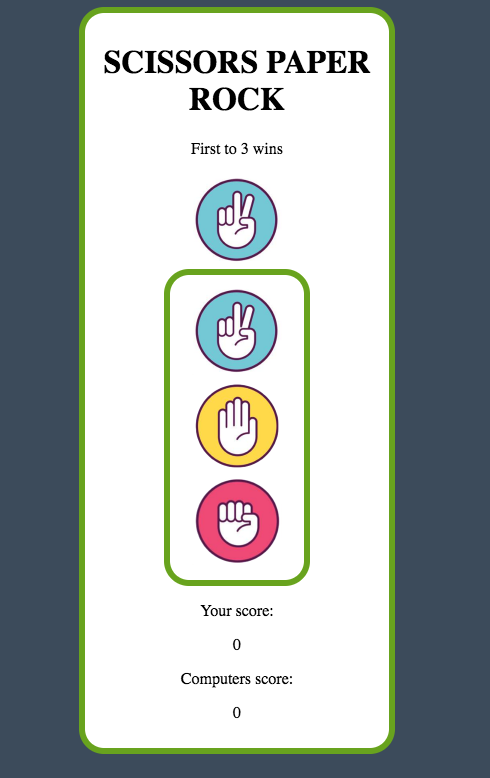
5) MORE CSS NOW TO MAKE OUR GAME LOOK BETTER
Click on the CSS section on the left hand side and delete all of the coloured borders we made before, but keep the headings
Add in body tags at the top and change the background colour with the following code, click 'Run' to see the effect.
Next, we target the div element and make changes. Be sure to click run after each line so that you know what each one does. For example, one line of code rounds the corners, another changes the colour of the borders. See if you can 'read' the CSS code and try to guess what you think it will do first.
Check your work:
6) CHECK YOUR WORK
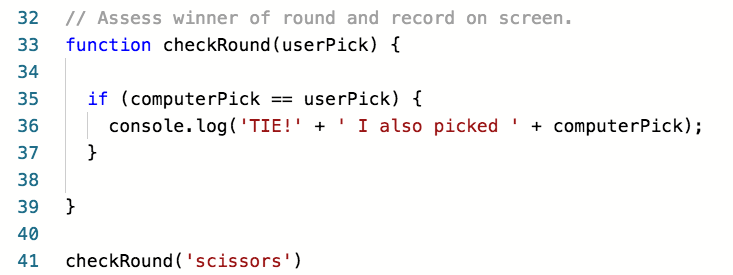
We are now going to do some more Javascript. FIrst of all lets check what our JS should look like so far
7) GET USERS GUESS INTO THE PROGRAM
Now that the computer picks either Scissors, Paper or Rock, we have to work out how to get the player or user to also pick one and then compare them.
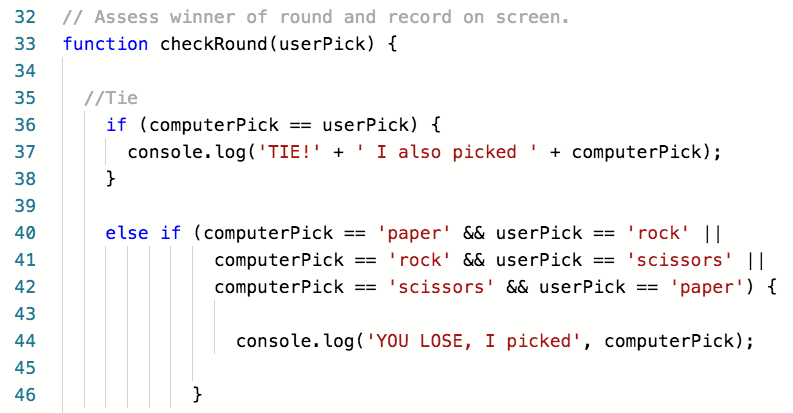
We are going to create a function. This function called checkRound(userPick) is defined at lines 33 - 39. Then it is called at line 41 with checkRound('scissors').
The (userPick) is just a placeholder which is replaced by the value when the function is called - 'scissors' in this case. Anything in the function called userPick is replaced with the value of 'scissors'.
The users guess is fixed at 'scissors' while testing. The computer pick is random, so we will have to keep hitting 'Run' it won't do anything until the computer picks 'scissors' which will be a match. It is possible the program doesn't pick 'scissors' for a long time - hang in there!
Check your work:
We can now get rid of the first console.log result which we set up to test originally
Now we want to add in the other possibilities - you lose or you win. Have a think about what are the scenarios when you lose and when you win and how could we program or code these?
8) SET UP WIN AND LOSE SCENARIOS
This is the most important part of the program, take your time. Lets start with every scenario where you lose or program wins.
Here is some pseudocode for situations where the computer wins (ie you lose):
If computerPick is paper and userPick is rock
If computerPick is rock and userPick is scissors
If computerPick is scissors and userPick is paper
Once we have the logic for
1) tie, and
2) computer winning, then we can say
3) 'else' - any other situation must be user winning.
Lets code the situations of the program winning first. Add the else if part under the first if statement (tie).
A few things to note here.
** The vertical pipe means 'or' and is usually above the enter key and you press with shift.
** The && operator must be done for both cases (computer and user) for each time, short cuts will not work
** Picture this as a normal if/else statement but its just bigger. Else if ( ---- ) { }.
** Else if prepares the program to make a comparison. What you are comparing goes in parenthesis, in this case there are 3 possible different scenarios of comparing two items. Inside the parenthesis is what you want to happen when any of these three are true, in this case output to console ' YOU LOSE...'.
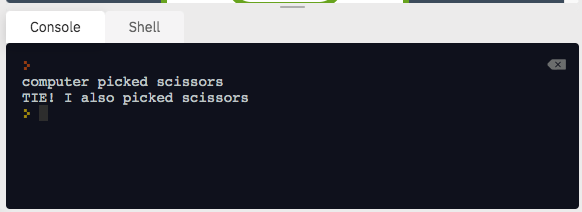
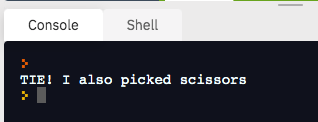
Now we can test our hard coded pick of scissors compared to the programs random generation. Run the code and check the results in the console. You should get either 'TIE I also picked scissors', ' YOU LOSE I picked rock' or no response. Now we have one last scenario
Final step now is the last else statement. After you add into javascript, you should get an outcome for every scenario against a hard coded userGuess of 'scissors'.
9) TEST TEST TEST!
The checkRound() function is where we decide if the comparison is tie, if the computer wins or if the user wins. Remind yourself of where this function is called from.
This function is called when the browser window is refreshed or when you click on 'Run' and the program reaches line 52 and sees checkRound('scissors'). The argument 'scissors' then enters that function via the parameter and replaces anything in the function that says userPick, this is how the users guess is determined.
What we could do first is replace 'scissors' in the function call with 'rock' and see if the game still works. Then try 'paper'. Are the results still sensible?
10) MAKE ICONS CALL THE CHECKROUND() FUNCTION
What we want to do here is cut the function call out of javascript and associate it with an icon so that the checkRound() function only runs when an icon is pressed.
Go to the HTML and look at line 17. We want to put the function call with the onclick event. At the moment the the event says onclick="clickScissors()" which would run that function of there was one.
Replace the event so that if the scissor icon is clicked it runs the checkRound() function with scissors as the argument.
Test your game, all going well if you click on scissors as the user guess it compares to the computers pick and outputs accordingly. The other two icons will generate on error.
Replace the code for the other two icons so that they run the checkRound() function but supply the correct argument that matches the icon.
What we have done here is use the same checkRound function that compares user input to computer pick, but by using three different arguments we can enter 3 different user guesses into the program.
That is the end of this tutorial to get the game functional and working. If you want to do more with the game like adding scores and have the computer picks icon look like it is alternating or 'spinning' between all three icons, we will cover those advanced features i the next tutorial.